 Welcome to the Muppet Central Forum!
 FIFA World Cup 2026 Final Halftime Show
 Sesame Street Classics on YouTube
 Sesame Street debuts on Netflix
 Back to the Rock Season 2
 Sam and Friends Book
 Jim Henson Idea Man
 Bear arrives on Disney+
Slackbot
Well-Known Member
- Joined
- Jun 14, 2010
- Messages
- 3,543
- Reaction score
- 3,156
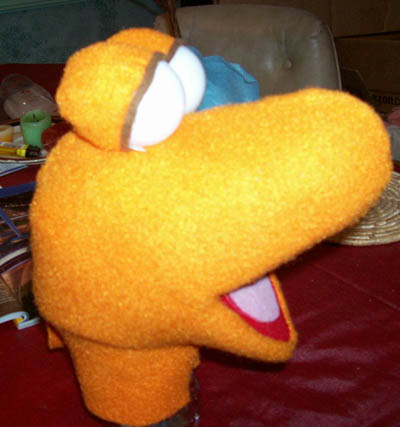
So some people have asked me how I build my puppets. And others have expressed interest in a "build journal." So, what the heck, I thought it'd be fun to show my work on my latest puppet. I'm making this from the ground up, starting with creating my own patterns from scratch, so there may be false starts and other goofery here. Hopefully not too much, though, as that stuff wears on my nerves!
This will be updated when I have the time. I have a lot of other things going on in my life, so the updates will come when I have progress to report. The updates may be fast and furious, or they may be days or even weeks apart. Probably not weeks, though. And I'm not an expert photographer, so my photo quality will probably be hit and miss. As long as you can see what I'm trying to show, it's good enough for me.
Feel free to ask questions. However, to head off one FAQ, no, I'm not planning to post or E-mail my patterns. Please don't ask for 'em.
Anyhow, here are some skull shots:
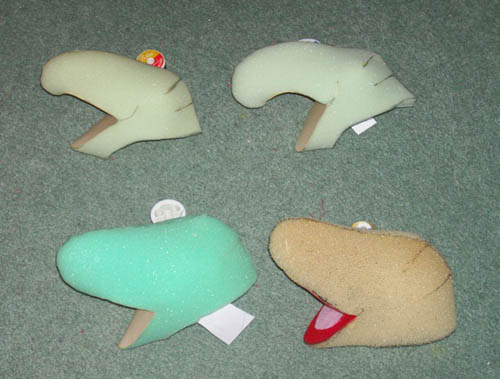
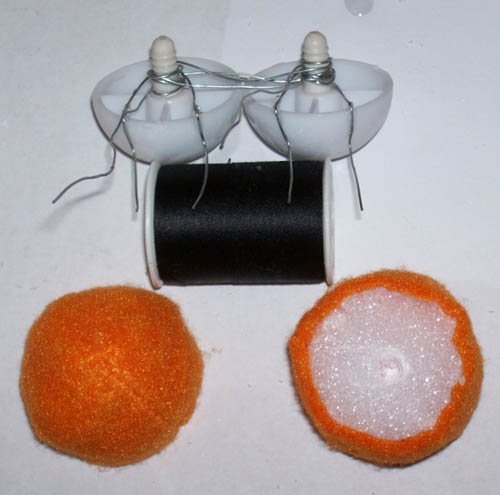
It took me multiple tries to get the head shape right, starting from the skull pattern from my Derpy puppet. These are my last four tries. There were one or two before this. You can see the shape evolved over successive tries. The paper sticking out of each is the pattern, which I save in case I decide I want to use one of those later. What isn't right for this character may work for another.
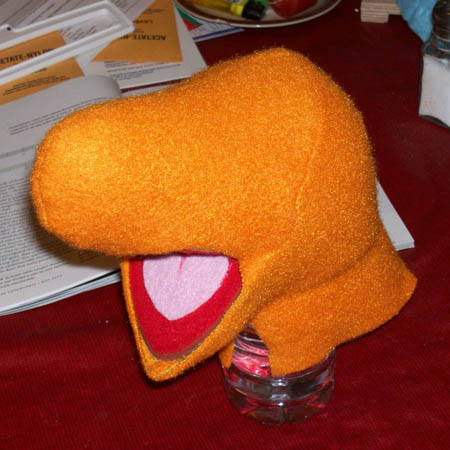
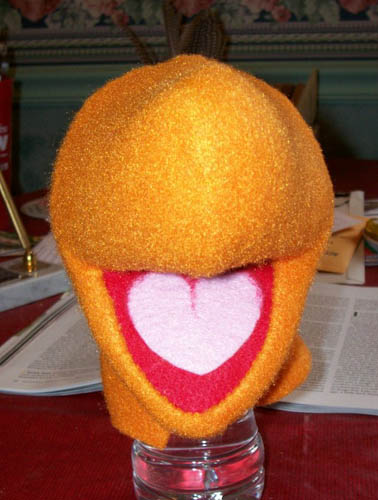
The mouthplates in the green test skulls are cut from manila folders. It's important to test the skull with the mouthplate glued in; it makes a big difference in the head shape! The final skull is at the lower right, and it's made out of reticulated foam rather than cheap open cell stuff. The mouthplate (made of gasket rubber) is already glued in.
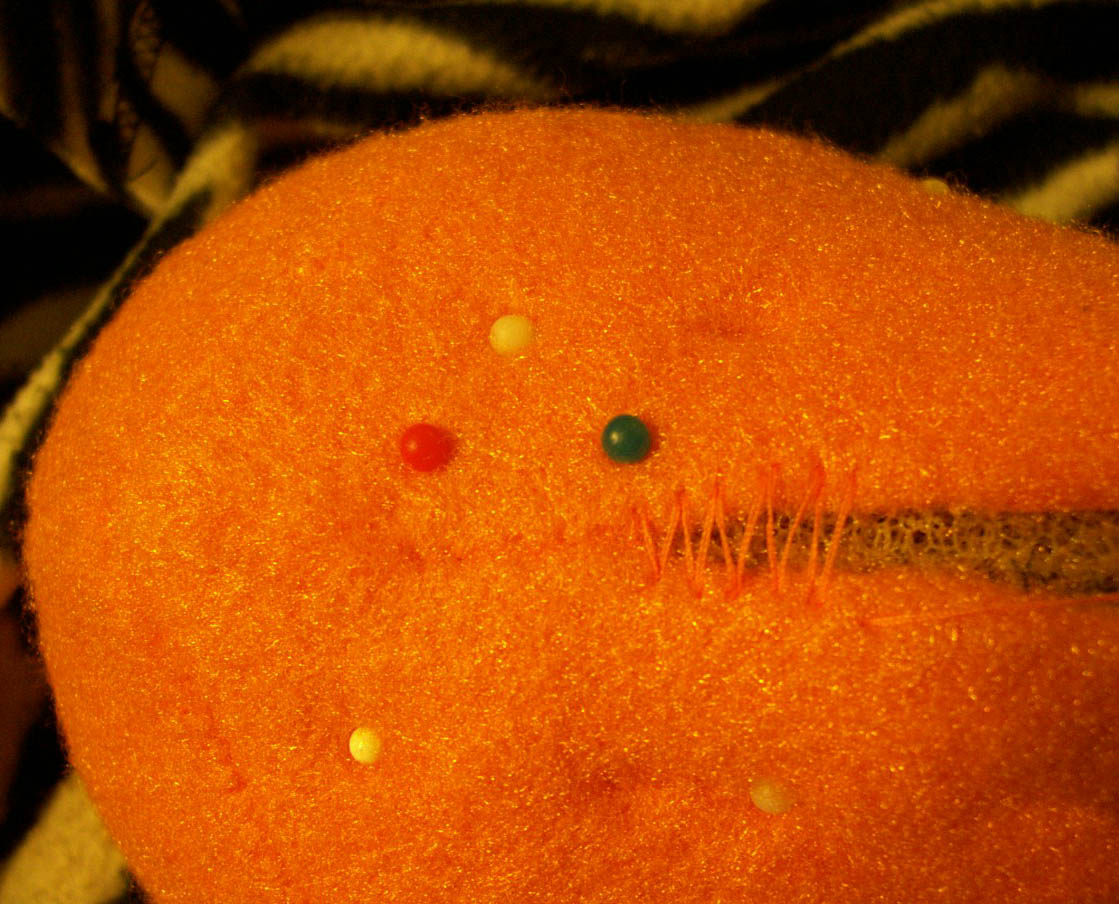
And here are some closeups of the skull. Excuse the lousy photography, but I'm a lousy photographer.
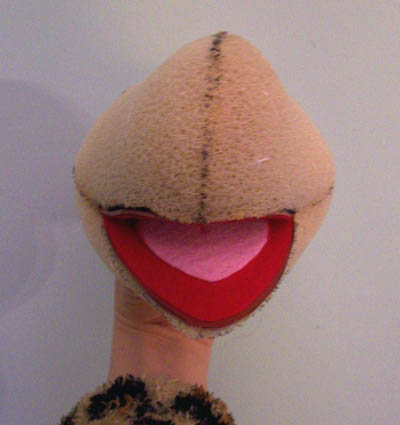
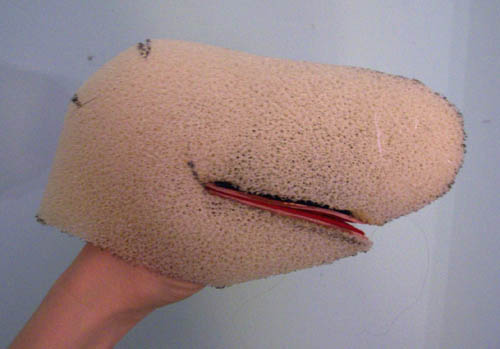
There's a strap attached to the top mouthplate for my hand to slide under, otherwise it'd rattle around in there. The black you can see between the mouthplate and foam is the edge of the strap. There's no need for a strap in the lower jaw, as it fits snugly enough.
This will be updated when I have the time. I have a lot of other things going on in my life, so the updates will come when I have progress to report. The updates may be fast and furious, or they may be days or even weeks apart. Probably not weeks, though. And I'm not an expert photographer, so my photo quality will probably be hit and miss. As long as you can see what I'm trying to show, it's good enough for me.
Feel free to ask questions. However, to head off one FAQ, no, I'm not planning to post or E-mail my patterns. Please don't ask for 'em.
Anyhow, here are some skull shots:
It took me multiple tries to get the head shape right, starting from the skull pattern from my Derpy puppet. These are my last four tries. There were one or two before this. You can see the shape evolved over successive tries. The paper sticking out of each is the pattern, which I save in case I decide I want to use one of those later. What isn't right for this character may work for another.
The mouthplates in the green test skulls are cut from manila folders. It's important to test the skull with the mouthplate glued in; it makes a big difference in the head shape! The final skull is at the lower right, and it's made out of reticulated foam rather than cheap open cell stuff. The mouthplate (made of gasket rubber) is already glued in.
And here are some closeups of the skull. Excuse the lousy photography, but I'm a lousy photographer.
There's a strap attached to the top mouthplate for my hand to slide under, otherwise it'd rattle around in there. The black you can see between the mouthplate and foam is the edge of the strap. There's no need for a strap in the lower jaw, as it fits snugly enough.