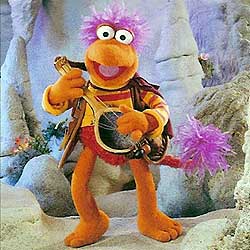
Photos would help us to give better specific responses, but just speaking generally...
Sculpture benefits greatly from an under-structure. If you were building a real human being from scratch, you wouldn't start with the face and work your way down, right? You'd start from the inside, the skeleton, and work your way out.
When I do Muppet figures, building the details over an existing action figure body saves me considerable engineering time. The points of articulation are already designed and worked out for me.
But if you're making a figure entirely from scratch, here are some methods I would suggest:
Sketch out the general shape you want on a piece of paper. Try to get it the size you want the figure to be, and don't be afraid to do several tries until you get it right. Once you have it the size and shape you want, draw lines down the center of each large area, where a 'skeleton' might go.
Now you can use these measurements to make an armature, which is a fancy term for a wire skeleton to go inside your figure. You could use the armature wire that they sell for sculpture at craft stores, you could cut up a wire coathanger and bend it with a pair of needle-nose pliers, heck you could even crumple aluminum foil into the basic shape you want.
Next, begin adding the modeling compound, in this case Sculpey, in blobs of the approximate shape of your sketch to the armature. Leave it a little smaller, because this is only the under-sculpture, the muscles if you will. We're gonna 'skin' it in another pass later.
Normally at this point I would recommend also studying anatomy, understand where the bones in a person/animal normally are, how they move and why, where the muscles attach, where they bunch up and why. That's sort of a moot point in sculpting a Muppet, since they're more cartoony, but on the other hand the people that built the original puppets understood these things, so it could still be a beneficial course of study.
Once you've got your undersculpture roughed in, start deciding about the placement of points of articulation. Do you want it to move at the neck and shoulders only? Are poseable hips important? Wrists? Think about these questions ahead of time and devise your internal connectors first. I recommend wooden dowels and simple rotation or 'pivot joints'. Hinge joints (like elbows and knees) and ball sockets (hips and shoulders) are much harder to create in miniature and should probably be left for more advanced projects.
Figuring out the shape and mobility issues will be a matter of trial and error. Have fun. Experiment. Learn what does and doesn't work, and why. Getting these issues resolved at a crude stage will lead to less heartbreak than if you're trying to figure them out on an intricately detailed piece.
When you have the under-figure the way you want, cure the Sculpey. I don't bake mine, I boil it. Less hassle, less fumes.
Now you're ready to begin skinning the figure, adding the outermost level of details. If you want it to have the level of texturing that a Palisades figure has, you MUST cure the Sculpey in small areas as you go. For example, sculpt the chest, then cure it. That way when you're sculpting the arms, you can handle it by the chest without leaving fingerprints in the still-soft Sculpey of the chest.
Always work from inner to outer. When I did my Link Hogthrob in disco attire, I did his chest, then his chest hair, then the open V-shape of the shirt buttons and buttonholes, and then the collar.
Things like beards that cross a point of articulation can be a real engineering problem. On Link I had a conflict between the placement of the Palisades pivot joint at the top of the boot, and the new design which had long pants legs. I first tried to leave in the joint by leaving a horizontal split in the bellbottoms just below the knee, but the Sculpey kept shattering every time I would try to move it. Eventually, to give strength to the design, I had to lose the point of articulation entirely. I glued the pivot joints shut, and made the bellbottoms solid from the knee down.
You may have to sacrifice the neck pivot to strengthen the beard by making it a solid part of the chest.
I hope some of these tips help out.
Alex

 Welcome to the Muppet Central Forum!
 Back to the Rock Season 2
 Sesame Street Season 54
 Bear arrives on Disney+
 Sam and Friends Book